Tuesday, August 25, 2015

Chairs

This is a miniature chair. I made it out of twigs and sticks from the backyard. It's about 7" tall.


The joints are glued with superglue using baking soda as the accelerator. I'm also using a fair amount of 5-minute epoxy here and there.

I decided to try weaving the chair seat. At first I tried to do so with pine needles, but that didn't work so well. Then I tried strips of masking tape, which worked great. I joined two strips of tape, sticky side to sticky side, to make a ribbon. Then I cut thin strips with an X-acto. Then I started weaving.


After it was done I added a thin wash of oil paints to the seat to make it not look so ... clean.

Soon this little guy will be heading for Free Art Friday in the ATL.

Friday, October 17, 2014

Ma.K Fledermaus Diorama - Cockpit Continued

Storage Compartment

I finished up prepping and painting all of the items that will go into the storage compartment behind the pilot's seat. You'll barely be able to see these items when the model is complete, so I didn't put a ton of time into them but I did want to have them there for flavor.


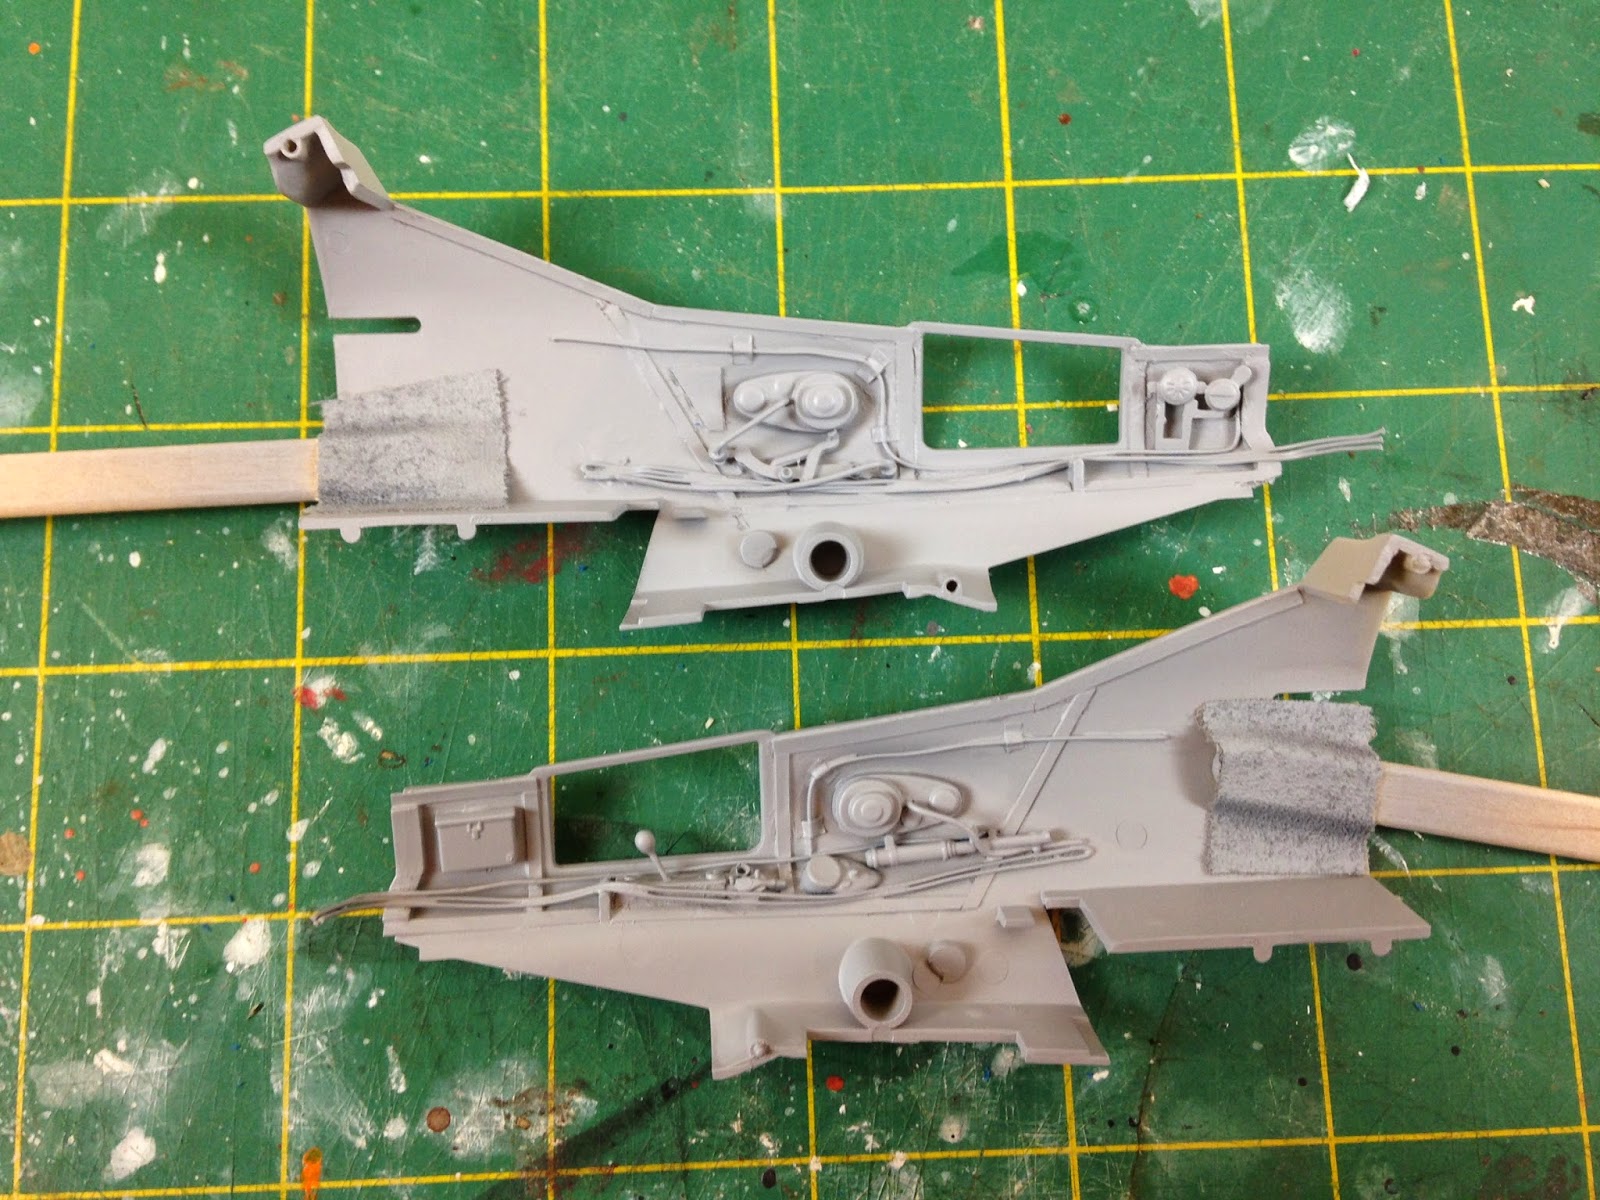
I also put a coat of primer on the sidewalls and ... cockpit middle thing with the seat and pedals and all. I'm sure that's what it's called.

I do love how a coat of primer just sucks all of the construction together visually. You really start to see all of the detail work beginning to come to life. Nothing like geeking out on primer.


Painting the cockpit interior is next. I'm going for the old "cockpit green with red knobs and silver things and wires and black parts and cool dials" look and feel. Check out the cockpit that Brett Green put together for this Spitfire. Awesome. This is my inspiration.

Submarine Spitfire Mk.IXc by Brett Green


Wednesday, October 8, 2014

Ma.K Fledermaus Diorama - Beginnings

The Bat

Well, so much for finishing the anglerfish sculpture before I let myself start on another scale model. I'll let my self off the hook this time, because the Ma.K Fledermaus was calling my name.

I've always loved the look of this 1/20 kit, with its spindly legs and big head/little body. I love how cramped the cockpit looks, like the pilot has to wriggle him/herself in like an Apollo astronaut. "Fledermaus" means "bat" in German. How cool of a name is that?

(C) Kow Yokoyama 1997

(C) Kow Yokoyama 1997

It's a great kit (despite being famous for some fit problems and some gaping holes into the interior of the kit), and I want to build an interesting diorama to frame it. This time I'm going to go for something more urban for the diorama; but first, the kit build.

Cockpit

Like I said, I like the idea of the cockpit being cramped and full of levers and dials and stuff, so I challenged myself to trick out the sparse cockpit.

I started in on the interior sidewalls, with lots of wire and little bits from my spares box. An old Testor 1/35 WWII motorcycle kit and an old 1/35 field tool kit proved especially useful for donor parts.


Given where I want to go with the story in the diorama, I also knew that I would need an open storage compartment somewhere, so I cut a hatch into the back of the cockpit, built a box behind it, and leaned the pilot's seat forward like you would in your Toyota Camry. I'll fill that compartment with various supplies for the pilot. In the shot below you can also see some sort of oxygen tank mounted above the pilot's left shoulder, made from an old miniature light bulb, a part from a guitar string, and a spare from the motorcycle kit. Fun stuff.


I also thought it would be cool to build a joystick, or whatever you call it - something like what you see in helicopters. Brass rod and Milliput did the trick.


Here are the pre-painted items to go into the storage compartment. A blanket, a water bottle, an MRE (meal ready to eat - made from super thin tin), some welding goggles (strap added with lead foil), and a few tools from the 1/35 field kit (they were too big for that scale anyway).


Man, I should clean my cutting mat. It looks like a flock of pigeons pooped all over it.

Wednesday, July 9, 2014

Anglerfish - In Progress 1

I've always had a thing for strange sea creatures. I have a particular affinity for deep sea oil rig remote submersible footage - where oil rig technicians send little remote controlled probes equipped with cameras down to deep sea pipelines and rigs to check things out or make repairs. Every once in a while one of these submersibles captures something crazy on their cameras. This makes my heart jump. Here are a few favorites.


I mean, come on. Who makes this stuff up?

I particularly love anglerfish - bizarre fish who live way deep down in the ocean where no sunlight reaches. They have a sort of fishing lure that extends off of their head that glows and wiggles, attracting smaller fish right up to the anglerfish's mouth. Clever.

I wanted to build one, and I wanted it to have lights.


The piece is built from brass and copper tubing and wire, soldered together at the joints.

I started this piece years ago, and it's time to finish it. I'll show you the base of the sculpture soon.

Monday, June 30, 2014

Fishing Lures

I'm in the process of finishing up the Ma.K Krote diorama, and thinking about what's next.

I decided that before I'll let myself dive into another scale model project (Ma.K Fledermaus is on deck), I would complete a different project that I've been working on lazily here and there for the last few years.

More soon.


Sunday, June 29, 2014

Ma.K Krote Diorama - Model Build

Build-up

The build of the Krote itself was nothing fancy. I built it according to the instructions and didn't go into any extra detailing as the details of the kit are wonderful. Plus since this was my first kit in 20 years, I didn't want to push my luck too far.

I did wire a white LED into the search light, though, because ... I'm a sucker for miniature lighting. And kittens.

Once all seams looked good, I primed the model.


Hairspray and Salt

I knew that I wanted to try out a few of the newer sweet weathering techniques that had emerged during my time away from the hobby. Hairspray and salt were at the top of my list.

LEARNING - Here's what I learned about hairspray and salt, after fully painting my Krote ... twice. This may not be how you do it, but after a pretty good FAIL on my first attempt, this is what worked for me.
  1. Apply the rust or other colored undercoat. I used Tamiya Hull Red, which worked fine, but I think next time I'll use something a little less red and a little darker. Put on 2-3 coats, and then seal it with matte sealer. I used Tamiya Matte Sealer out of a can
  2. Hit the hairspray. I found that the coating shouldn't be too light and not too heavy, and that spraying it from the can rather than through my airbrush worked well. I just went for "wet," and this worked
  3. Hit the salt. I went sparingly with the salt. I love weathering, but I don't love overdone weathering. I mixed coarse kosher salt with finer grain table salt and this gave me a good variety of flakes. After I sprinkled the salt onto the wet hairspray, I hit the model again with another light coat of hairspray
  4. Apply the overcoat. I went for a simple camouflage scheme that I made up on the spot from Tamiya Acrylic German Gray and Light Sea Gray
  5. Get to scrubbin'. Run the model under warm water and start scrubbing oh so gently with a paintbrush, a cloth, a scouring pad, whatever you find works well. Start slooooow and work your way up. Overdone comes on quick
  6. Seal it again so that it's ready for weathering


This is an awesome technique that works like a charm.

From there I applied simple oil washes of dark brown and black to pull out surface detail. I then added another wash of raw sienna oil paint and Turpenoid to certain areas to give the Krote an overall slightly rusted look - again, not too much.

For the engine, gun, and other metallic internals I base coated in Tamiya Gunmetal and Black, and then washed certain components with lighter colors for variety. Once dry I applied the same raw sienna rust wash, and then rubbed ground graphite onto these parts with my finger, which gives it a really cool ... enginey look.